khz
||||||||||
<c/p von Quelle: dkbuilder: from circuit to LV2 plugin >> https://linuxmusicians.com/viewtopic.php?f=44&t=19586>
####
Pre-requests:
geda, geda-gattrib, geda-gnetlist, geda-gschem, geda-gsymcheck, geda-symbols, python-virtualenv, virtualenv, virtualenvwrapper, faust 0.9.90, libeigen3-dev, libcminpack-dev, libsundials-serial-dev, maxima (maxima-share) and guitarix source from git repository
when you've installed all that, set up a virtualenv to work with the dkbuilder. Point your terminal to the folder /trunk/tools/ampsim/DK/ in the guitarix source tree, and run :
when done, close your terminal and open your ~/.bashrc with a editor and add the following macro at the end of file:
of-course, replace the /path/to with your path.
now you could use the dkbuilder by simply typing "dkbuilder" in your terminal.
the dkbuilder use some additional symbols which are in /guitarix-git/trunk/tools/ampsim/DK/gschem-symbols. To use them you need to edit your ~/.gEDA/gafrc file. (if not exist, create it) and add the following line to it:
of-course, you know what to do with the /path/to part.
workflow:
Now you could create a circuit with gschem, the geda schematic editor. For easy starting you could open /guitarix-git/trunk/tools/ampsim/DK/gschem-schematics/Startset.sch which comes with a couple of predefined elements you could use to stick your circuit together.
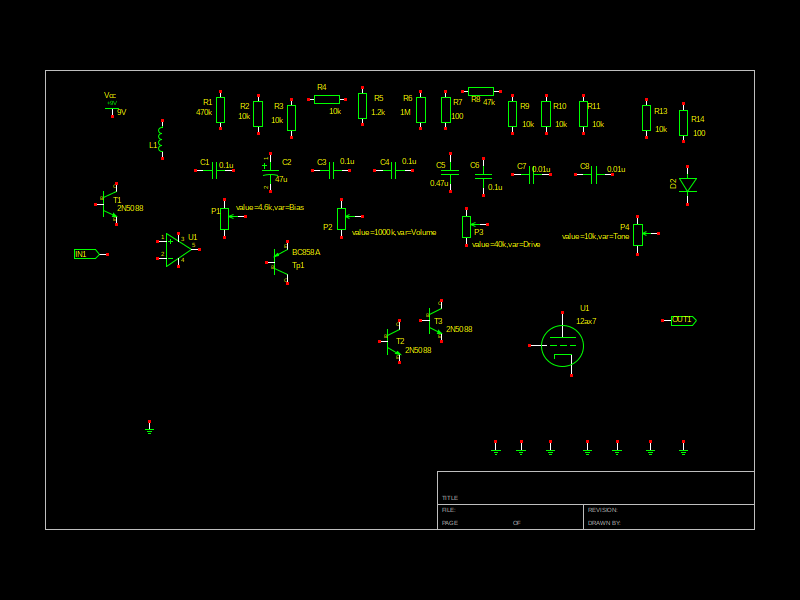
Now, let's say you would create a plugin from this schematic:
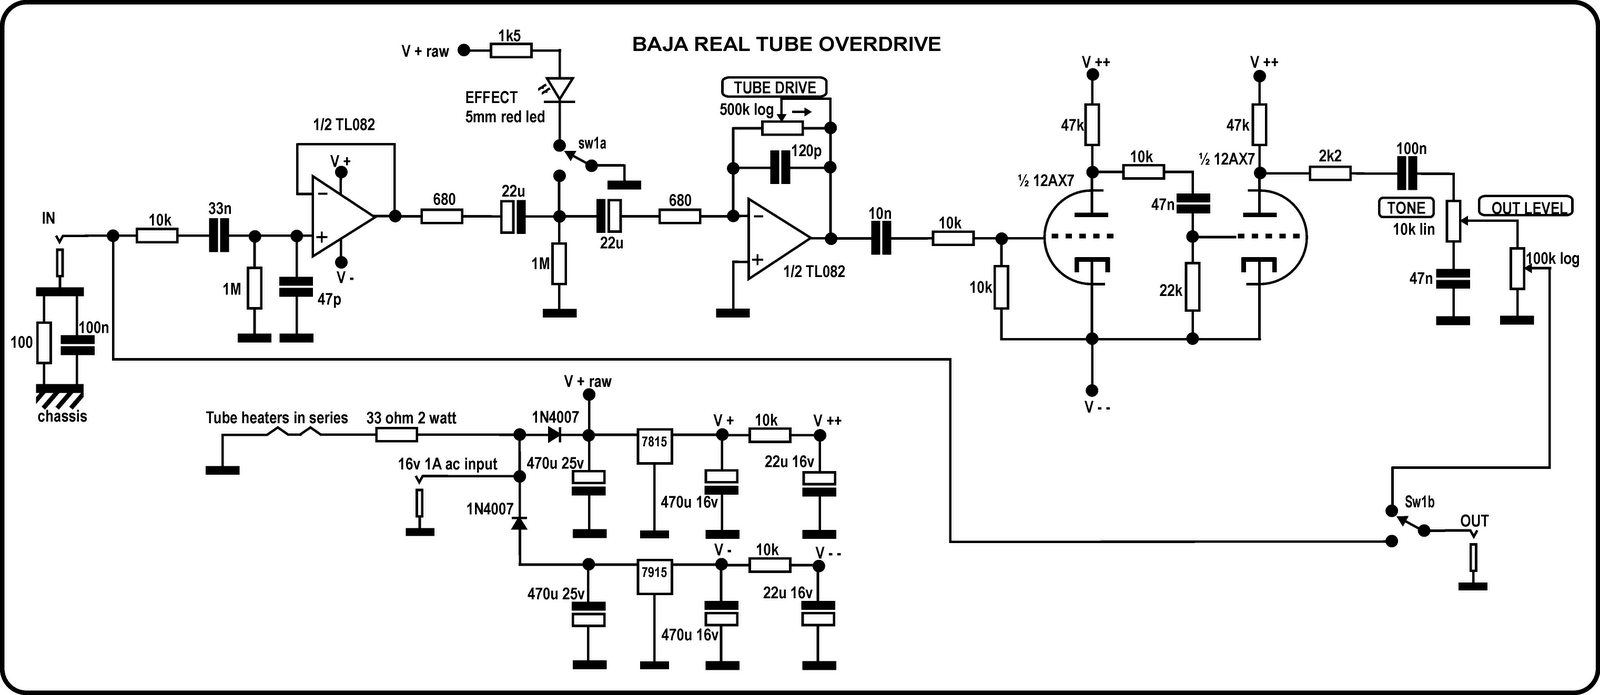
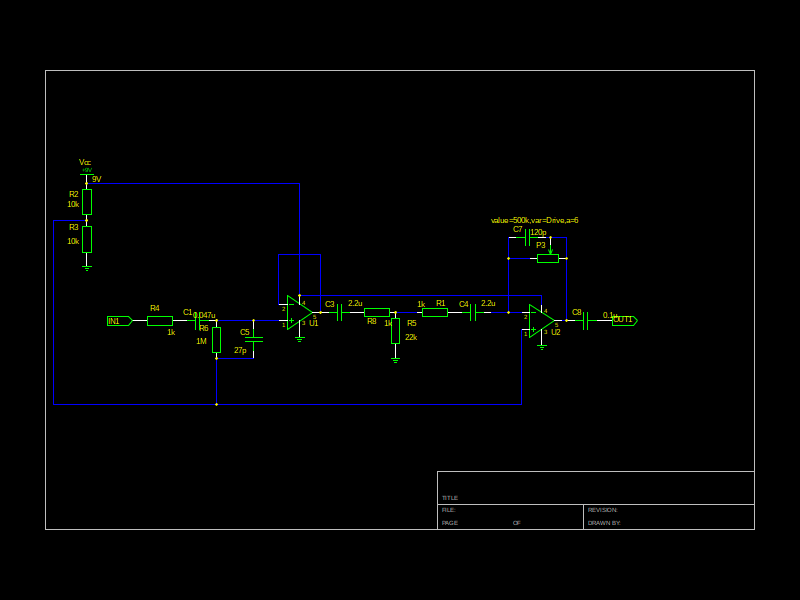
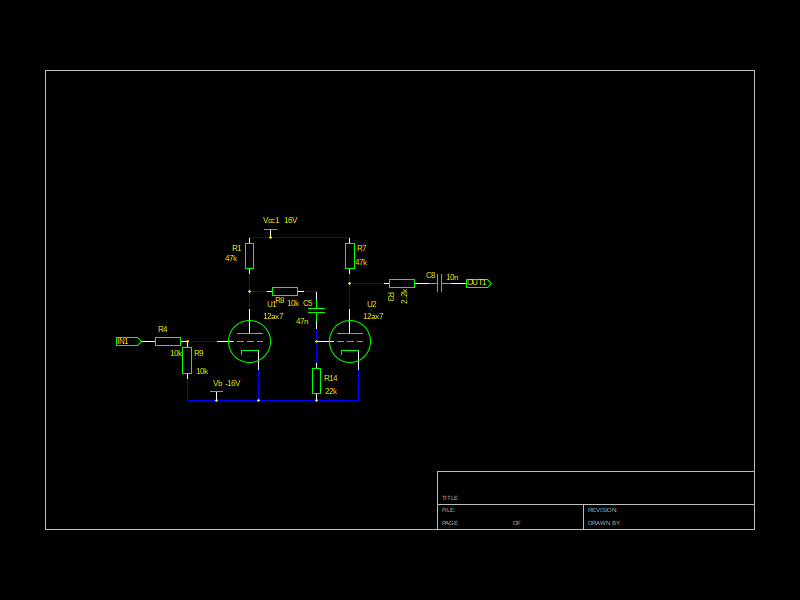
The best way is to split the schematic, we've a input buffer ( or preamp here), a amp (that'S were the non-linearity happen here) and a output buffer (here a passive tone and volume control). So creating 3 circuit's from the circuit above:
BajaTubeDriverp1.sch
BajaTubeDriver.sch
BajaTubeDriverp3.sch
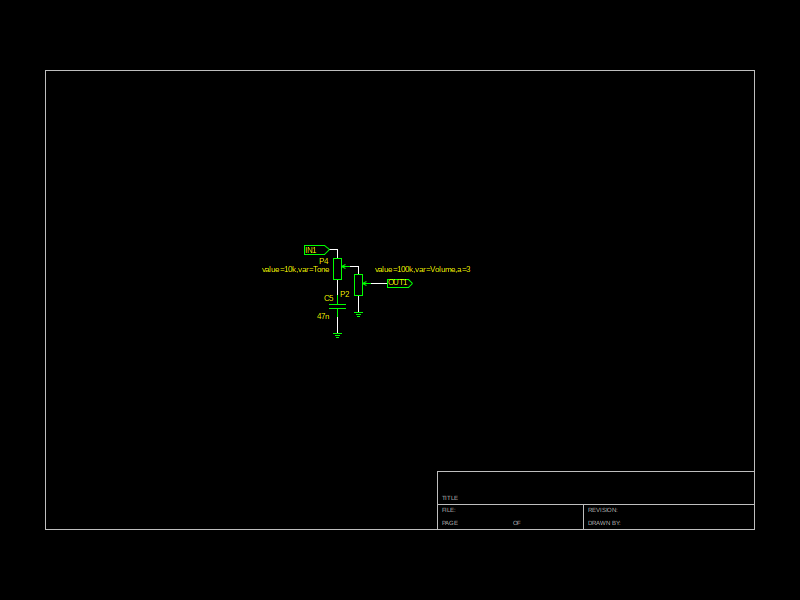
Result:
To build a guitarix plugin from the circuit's start the dkbuilder, and run the build-plug.py script with the following command:
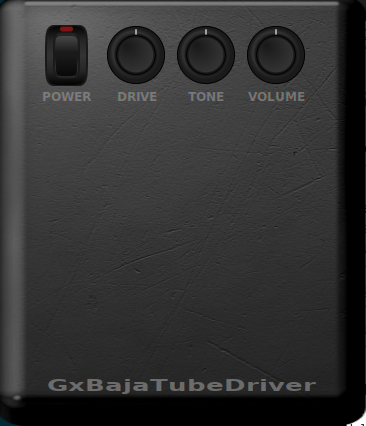
this will create the faust source code, create a non-linear response table (a plot of it will be shown) for the 2. circuit and concatenate all together into one file, and finally build and install the guitarix plugin, which you'll find in guitarix under the "Extern" category.
Check the build-plug-py file for more build options, eg. you could do a frequency plot of a circuit, etc.
Now, say you would create a LV2 plugin from it, run:
this will build a LV2 bundle with a X11 based interface and install it to your ~/.lv2 directory, so do a rescan in your LV2 host and you could use it.
All that said, please note that the dkbuilder is still experimental, only advanced users (developers) should use it, however, I like to share my workflow here with you, so, if you interested in electronic circuit's, C++ development and open source, you may have fun with this toolkit.
regads
hermann
####
</c/p von Quelle: dkbuilder: from circuit to LV2 plugin >> https://linuxmusicians.com/viewtopic.php?f=44&t=19586>
####
Pre-requests:
geda, geda-gattrib, geda-gnetlist, geda-gschem, geda-gsymcheck, geda-symbols, python-virtualenv, virtualenv, virtualenvwrapper, faust 0.9.90, libeigen3-dev, libcminpack-dev, libsundials-serial-dev, maxima (maxima-share) and guitarix source from git repository
when you've installed all that, set up a virtualenv to work with the dkbuilder. Point your terminal to the folder /trunk/tools/ampsim/DK/ in the guitarix source tree, and run :
Code:
source /usr/share/virtualenvwrapper/virtualenvwrapper.sh
mkvirtualenv -r python_venv guitarix
when done, close your terminal and open your ~/.bashrc with a editor and add the following macro at the end of file:
Code:
dkbuilder() {
  source /usr/share/virtualenvwrapper/virtualenvwrapper.sh
  cd /path/to/guitarix-git/trunk/tools/ampsim/DK/gschem-schematics
  workon guitarix
}
of-course, replace the /path/to with your path.
now you could use the dkbuilder by simply typing "dkbuilder" in your terminal.
the dkbuilder use some additional symbols which are in /guitarix-git/trunk/tools/ampsim/DK/gschem-symbols. To use them you need to edit your ~/.gEDA/gafrc file. (if not exist, create it) and add the following line to it:
Code:
(component-library "/path/to/guitarix-git/trunk/tools/ampsim/DK/gschem-symbols")workflow:
Now you could create a circuit with gschem, the geda schematic editor. For easy starting you could open /guitarix-git/trunk/tools/ampsim/DK/gschem-schematics/Startset.sch which comes with a couple of predefined elements you could use to stick your circuit together.
Now, let's say you would create a plugin from this schematic:
The best way is to split the schematic, we've a input buffer ( or preamp here), a amp (that'S were the non-linearity happen here) and a output buffer (here a passive tone and volume control). So creating 3 circuit's from the circuit above:
BajaTubeDriverp1.sch
BajaTubeDriver.sch
BajaTubeDriverp3.sch
Result:
To build a guitarix plugin from the circuit's start the dkbuilder, and run the build-plug.py script with the following command:
Code:
build-plug.py -i BajaTubeDriverp1.sch BajaTubeDriver.sch BajaTubeDriverp3.sch --table 2 --build -n BajaTubeDriverthis will create the faust source code, create a non-linear response table (a plot of it will be shown) for the 2. circuit and concatenate all together into one file, and finally build and install the guitarix plugin, which you'll find in guitarix under the "Extern" category.
Check the build-plug-py file for more build options, eg. you could do a frequency plot of a circuit, etc.
Now, say you would create a LV2 plugin from it, run:
Code:
python build-plug.py -i BajaTubeDriverp1.sch BajaTubeDriver.sch BajaTubeDriverp3.sch --table 2 --buildlv2 -n BajaTubeDriverthis will build a LV2 bundle with a X11 based interface and install it to your ~/.lv2 directory, so do a rescan in your LV2 host and you could use it.
All that said, please note that the dkbuilder is still experimental, only advanced users (developers) should use it, however, I like to share my workflow here with you, so, if you interested in electronic circuit's, C++ development and open source, you may have fun with this toolkit.
regads
hermann
####
</c/p von Quelle: dkbuilder: from circuit to LV2 plugin >> https://linuxmusicians.com/viewtopic.php?f=44&t=19586>
Zuletzt bearbeitet: